Here is a step by step tutorial on how to authorise SJI. It’s worth mentioning, the only thing that user has to perform is to follow an easy “press blue button” wizard and refresh a Confluence at the end.
#1 Click “Authorize to see the issue”
If a Jira issue has already beed added on a Confluence page by a different user, you will find this macro:

Seeing that, click the Authorize link.
If you are about to add your first issue, start by using a /jj shortcut in the Confluence editor:
#2 On the modal, click “Authorize!”

#3 Confirm authorisation
On the authorisation consent screen pick up your Jira cloud instance from the “Authorize for” list and confirm it.

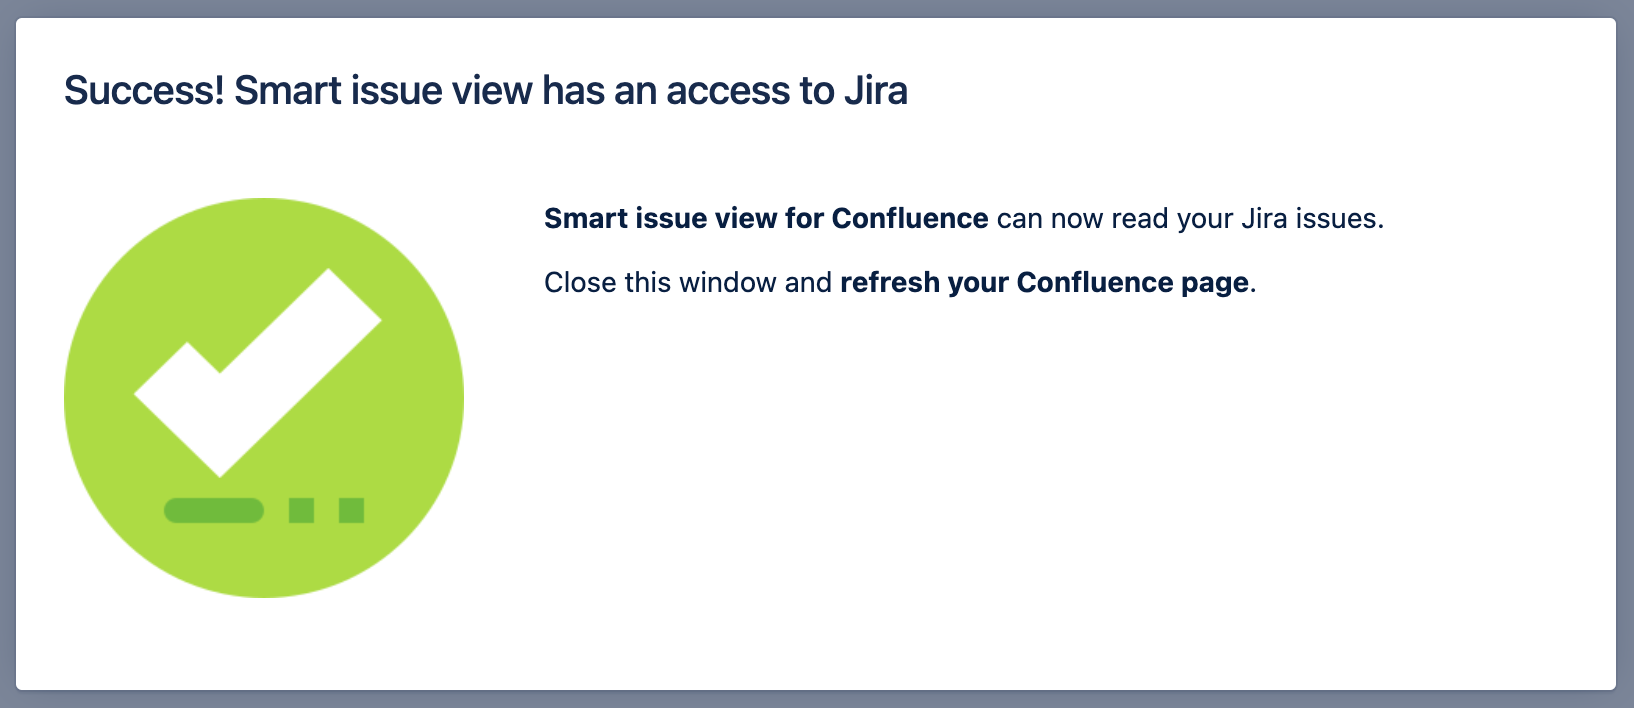
#4 Confirmation screen
On the following screen you will see the permission granting confirmation screen. You can close it.
#5 Refresh the Confluence page
Refresh the page and that’s it!
